All About Sheet Mulching

Sheet mulching has been all the rage in home gardening for the last twenty years, and for some pretty good reasons. It cuts the amount of weeding needed, helps retain more water in the soil, and gives garden plants an extra boost. I know there are a number of you who have been avid gardeners for years and are wondering what in the world I am talking about. Perhaps you have never heard of sheet mulching and might even be suspicious that I am making it up or selling a cure all.
Do you remember “lasagna gardening”? Or have you seen the current Back to Eden gardening fad? Both are a type of sheet mulching. And while each has a different emphasis and somewhat different methodology, they both do the same basic thing. Maybe you are not familiar with either of them, so let’s break the process down into steps and explain each step.
The Sheet Layer
The sheet is the basic layer in sheet mulching. It is not all ways the first layer to go down (more about that later), but it is the required base that makes the rest of the system work. The sheet can be any biodegradable thin material that spreads out to create a barrier to sun and any existing small plants. The sheet layer can be made out of newspaper, cardboard, butcher paper, cotton or jute fabric, large thick leaves, or any other similar sheet-like material. The sheet layer is mostly an extra weed stopping barrier. By helping block out the sunlight it prevents many weed seeds from germinating and slows or even stops existing annuals and perennials from getting more sun to grow. You do not need one single sheet to cover the entire area, you can lay down smaller blocks to do the job, but they must have enough overlap to give good light blockage and slow down any existing weeds coming up from the roots. I usually try for at least six inches of overlap.

The Mulch Layer
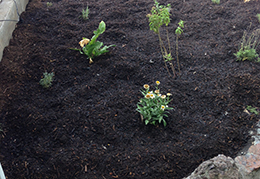
The second mandatory layer in sheet mulching is the mulch layer. This can be compost, tree leaves, wood chips, or any other nontoxic, easily obtained biodegradable material. Minimum amount of mulch on top of the sheet should be three to four inches. You can do more, but you need to make sure that whatever you are planting does not get downed in the mulch. Small plants are obviously vulnerable to getting buried in mulch, but even a large tree can drown in too much mulch.
The Nitrogen Layer
A nitrogen source is the third layer. It is not always needed and it is only used very lightly, but if you have a lot of wood or paper in the mulch, microbes in the soil will temporarily deplete the available nitrogen in the top layer of soil while they try to break some of that tough material down. Trees or other plants with established deep roots will likely not notice the depletion, but smaller plants and any transplants will have problems. If the nitrogen is a cheap chemical formulation or an easily mobile organic form like blood meal, I put the nitrogen layer on top of the sheet, or sometimes even on top of the mulch. If I am using a slow release chemical or most organic sources I place the nitrogen source under the sheet layer where it will be ready for hard working microbes. When I say nitrogen source, it can be any of the packaged chemical brands or it can be an improvised organic source. I have used manure, alfalfa meal, and soy meal, but anything you have access to is just fine.
There are many places to use sheet mulch and some really cool advanced techniques, but you should start by using sheet mulch in any area where you are waiting to put plants in or where you have space in your current plantings. As you get used to using it you will notice places where it will help out your garden plants and make weeding much easier. Go ahead and try it in those areas and make the most of a great tool.
Manana!